Machine Generated Data
Tags
Color Analysis
Categories
Imagga
| text visuals | 99.9% | |
Captions
Microsoft
created on 2019-05-30
| a close up of text on a white background | 73.4% | |
| a close up of text on a white surface | 70% | |
| a close up of text on a black background | 66% | |
OpenAI GPT
Created by gpt-4 on 2025-03-07
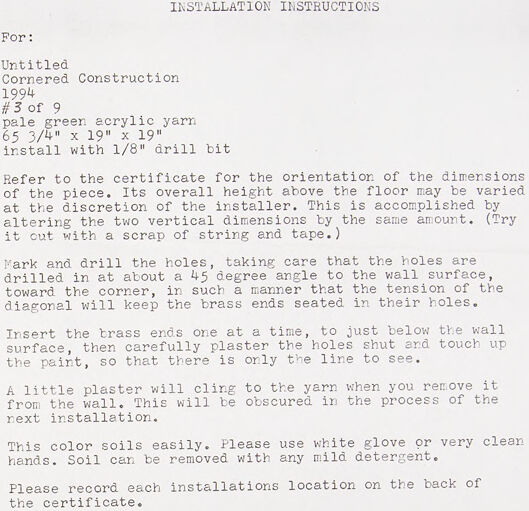
The image shows a piece of paper with typed text titled "INSTALLATION INSTRUCTIONS." Next to the instructions, to the left, there is a loosely coiled piece of pale green acrylic yarn and two brass end caps. The instructions refer to a numbered artwork (#3 of 9), titled "Untitled" and categorized as a "Combined Construction" from 1993. The piece is described to be made of pale green acrylic yarn, 65 3/4" x 19" x 19", and is to be installed with a 1/8" drill bit. The text details steps for the proper installation of the artwork, mentioning the need for a certificate for orientation reference, drilling holes at a 45-degree angle to the wall surface, inserting the brass ends one at a time, and care to ensure only the yarn line is visible. It also advises that a little plaster will adhere to the yarn during removal but can be obscured during the next installation, and that the yarn can stain easily, recommending white gloves or very clean hands for handling and mild detergent for cleaning. The last sentence requests the recording of each installation's location on the back of the certificate.
Created by gpt-4o-2024-05-13 on 2025-03-07
The image shows two primary objects: a piece of light blue acrylic yarn with brass ends, and a printed sheet of paper containing installation instructions. The yarn is coiled neatly and has tapered brass ends, one on each side. The paper is titled "INSTALLATION INSTRUCTIONS" and is addressed "For: Untitled Cornered Construction 1994 #3 of 9", specifying the material ("pale green acrylic yarn"), the dimensions (65 3/4" x 19" x 19"), and the installation tool (1/8" drill bit). The instructions detail the process for installing the yarn piece, including marking and drilling holes, inserting the brass ends, using plaster to secure them, and touching up any surface damage. It also advises to handle the yarn with clean hands or gloves to prevent soiling and to record the installation's location on the certificate.
Anthropic Claude
Created by claude-3-haiku-20240307 on 2025-01-14
The image shows a set of installation instructions for an artwork titled "Untitled" by Cornered Construction, dated 1994. The instructions provide detailed guidelines for installing the artwork, which consists of a 65 3/4" x 19" x 19" pale green acrylic yarn piece, to be installed with a 1/8" drill bit. The instructions emphasize the importance of following the orientation guidelines provided in the certificate, and caution that the tension of the artwork must be maintained during installation. The text also advises on handling the plaster and cleaning the soiled areas, as well as recording the location of the installation on the back of the certificate. Overall, the image provides a clear and comprehensive set of instructions for properly installing this particular artwork.
Created by claude-3-5-sonnet-20241022 on 2025-01-14
This image shows installation instructions for an untitled artwork from 1994, labeled as "#3 of 9". The artwork appears to be a "Cornered Construction" made with pale green acrylic yarn, with dimensions of 65 3/4" x 19" x 19". Next to the typed instruction sheet is a piece of the actual pale mint-green yarn with what appears to be brass ends. The instructions detail specific steps for installation, including: - Using a 1/8" drill bit - Drilling holes at a 45-degree angle toward the corner - Information about plaster application - Handling instructions noting that the color soils easily and should be handled with white gloves or clean hands - Instructions to record installation locations The document has a professional, formal appearance and provides detailed technical specifications for proper installation of this piece of conceptual art.
Created by claude-3-opus-20240229 on 2025-01-14
The image shows installation instructions for installing covered construction yarn on a wall surface. The instructions specify using #3 of 9 pale green acrylic yarn installed with 1/8" drill bit. The instructions mention marking and drilling holes, taking care that the holes are drilled in at about a 45 degree angle to the wall surface towards the corner. If done in a manner where the tension of the diagonal will keep the brass ends seated in their holes, a little plaster can be used to secure the yarn ends just below the wall surface before carefully plastering the holes shut. A tip is given to remove any plaster from the wall when removing the yarn, as the color soils easily. Finally, it instructs to record each installation's location on the back of the certificate.
Meta Llama
Created by us.meta.llama3-2-90b-instruct-v1:0 on 2025-01-14
The image presents a photograph of an installation instruction sheet, accompanied by a bundle of pale green yarn with two gold tips on the left side. The instruction sheet is titled "INSTALLATION INSTRUCTIONS" and provides detailed guidance for installing a piece titled "Cornered Construction." The instructions specify the use of pale green acrylic yarn, 65 3/4" x 19" x 19" in size, and include a drill bit with a 1/8" diameter. The instructions outline the process of drilling holes, inserting brass ends, plastering, and removing the yarn from the wall. The background of the image features a light gray color, which serves as a neutral backdrop for the instruction sheet and the bundle of yarn. Overall, the image appears to be a documentation of an art installation or a DIY project, providing clear instructions for the viewer to follow.
Created by us.meta.llama3-2-11b-instruct-v1:0 on 2025-01-14
The image features a typed page of installation instructions for an art piece, accompanied by a pale green acrylic yarn with gold tips on the left side. The instructions are printed on white paper and include the following information: * Title: "Untitled Cornered Construction" * Year: 1994 * Number of pieces: "#3 of 9" * Material: Pale green acrylic yarn * Dimensions: 65 3/4" x 19" x 19" * Installation method: Drill bit with 1/8" drill bit The instructions provide detailed guidance on how to install the piece, including: * Marking and drilling holes at a 45-degree angle to the wall surface * Inserting the brass ends one at a time to just below the wall surface * Plastering the holes shut and touching up the paint * Clinging to the yarn when removing it from the wall * Using white gloves or very clean hands to handle the color * Removing soil with any mild detergent The background of the image is a plain gray color, providing a neutral backdrop for the instructions and the yarn. Overall, the image presents a clear and concise guide for installing the art piece, along with a visual representation of the materials required.
Amazon Nova
Created by amazon.nova-pro-v1:0 on 2025-01-14
The image displays a white sheet of paper with printed instructions for the installation of an artwork, specifically a piece titled "Untitled Cornered Construction #3 of 9." The artwork is described as being made of pale green acrylic yarn, measuring 65 3/4" x 19" x 19". The instructions include detailed steps for installation, such as marking and drilling holes at a 45-degree angle, inserting the artwork, and using plaster to secure it. The paper also mentions the use of a certificate for orientation and notes that the artwork can be removed with mild detergent. Additionally, the image shows a physical component of the artwork, which appears to be a loop of pale green yarn with two small metal hooks attached, possibly for hanging or securing the piece.
Created by amazon.nova-lite-v1:0 on 2025-01-14
The image shows a white sheet of paper with black text, which appears to be a set of installation instructions. The instructions are for a piece of art or installation titled "Untitled Cornered Construction #3 of 9," created in 1994. The piece is made of pale green acrylic yarn, measuring 65 3/4" x 19" x 19". The instructions include details on how to alter the height of the piece, how to mark and drill holes, and how to install the brass ends. The text also mentions that the color of the yarn soils easily and advises using white gloves or very clean hands during installation. The image also shows a piece of green yarn with two gold-colored metal objects attached to it, which are likely the brass ends mentioned in the instructions.
Created by amazon.nova-lite-v1:0 on 2025-01-11
The image displays a white sheet of paper with black text, providing installation instructions for an art piece. The instructions are titled "Installation Instructions" and are addressed to "Untitled Cornered Construction #3 of 9." The text specifies the materials needed, including pale green acrylic yarn, a 65 3/4" x 19" x 19" piece, and a 1/8" drill bit. It also mentions the certificate for orientation and advises on varying the height of the piece by altering the vertical dimensions. The instructions detail the process of marking and drilling holes at a 45-degree angle, inserting brass ends, and using plaster to seal the holes. Additionally, it mentions the ease with which the color soils and recommends using gloves or clean hands during installation. The image also includes a small, light blue rope with two gold-colored pins attached to it, possibly indicating the yarn or a component of the installation.
Created by amazon.nova-pro-v1:0 on 2025-01-11
The image shows a white piece of paper with printed text. It is titled "Installation Instructions." The instructions are for an untitled cornered construction from 1994, which is the third of nine pieces. The piece is made of pale green acrylic yarn with specific dimensions. The instructions detail how to install the piece, including marking and drilling holes, inserting brass ends, and using plaster to secure the yarn. The color of the yarn is mentioned to soil easily, and it is advised to use white gloves or clean hands. The instructions also mention recording the installation location on the back of the certificate. On the left side of the image, there is a looped object that looks like a string with two small objects at the end that look like nails.
Text analysis
Amazon